Tips and tools for WordPress, Google and more
Woocommerce and Facebook
With the Facebook for WooCommerce plugin, your WordPress / Woocommerce online store can connect to Facebook and automatically offer your products via Facebook.
Important note: The store function on Facebook has been available in Austria since August 10, 2023 no longer possible. In Germany, on the other hand, stores on Facebook and Instagram without activated Conclusion of purchase with Facebook or Instagram will continue to be used until further notice.
Connecting Woocommerce to Facebook means that you can automatically synchronize your Facebook product catalog with the articles in your Woocommerce online store. This has significant advantages:
- You can easily advertise certain products from your store on Facebook
- Facebook can show users products for which the algorithm can recognize a particular affinity among users
- You can set up a Facebook Shop and an Instagram Shop with just a few clicks, the articles are taken from the product catalog.
This tutorial will guide you step by step through the setup of the plugin Facebook for Woocommerce which you can use to connect your WordPress/Woocommerce store to Facebook. This means that the product catalog of your online store is available for your Facebook store and your Facebook advertising.
Table of Contents
- Prerequisite - Domain confirmation
- Connecting Woocommerce with Facebook
- Synchronize products with Facebook
Prerequisite - Domain confirmation
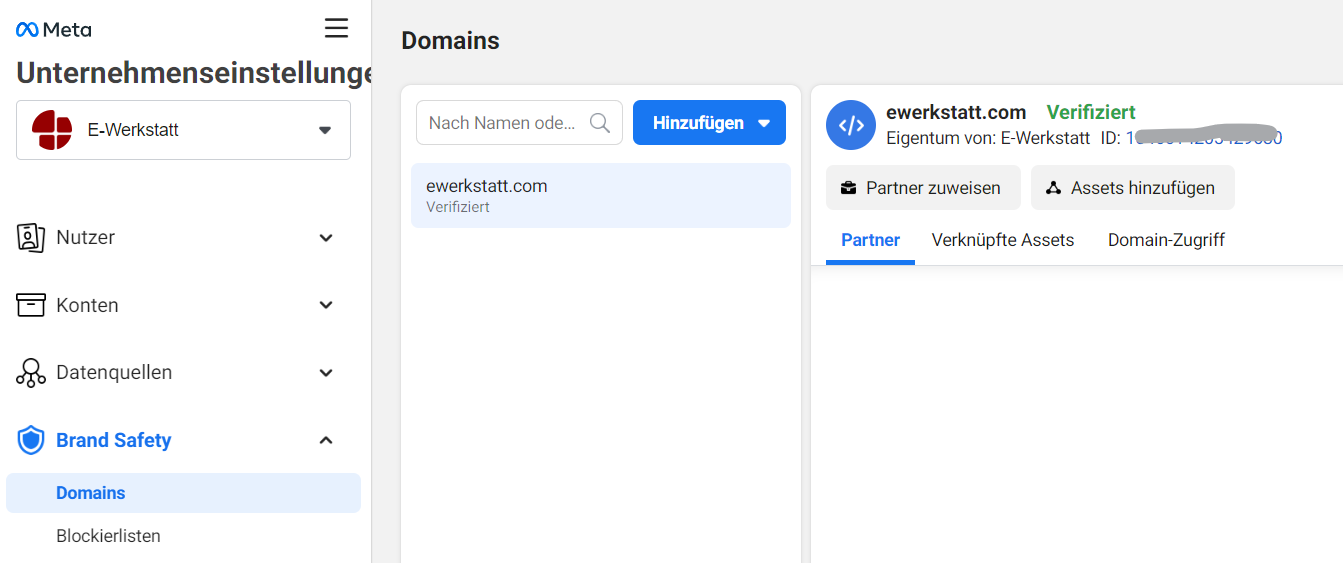
Facebook wants to know whether you are really the owner of the store domain. You must therefore confirm the domain of your online store on Facebook (Business Manager > Brand Safety > Domains).
You can read more about this in this Facebook guide:
https://developers.facebook.com/docs/sharing/domain-verification/
Connecting Woocommerce with Facebook
Note in advance:
You can only use the connection to Facebook for physical products but not for digital content or downloads.
Install the plugin Facebook for Woocommerce in your WordPress/Woocommerce online store and activate it.
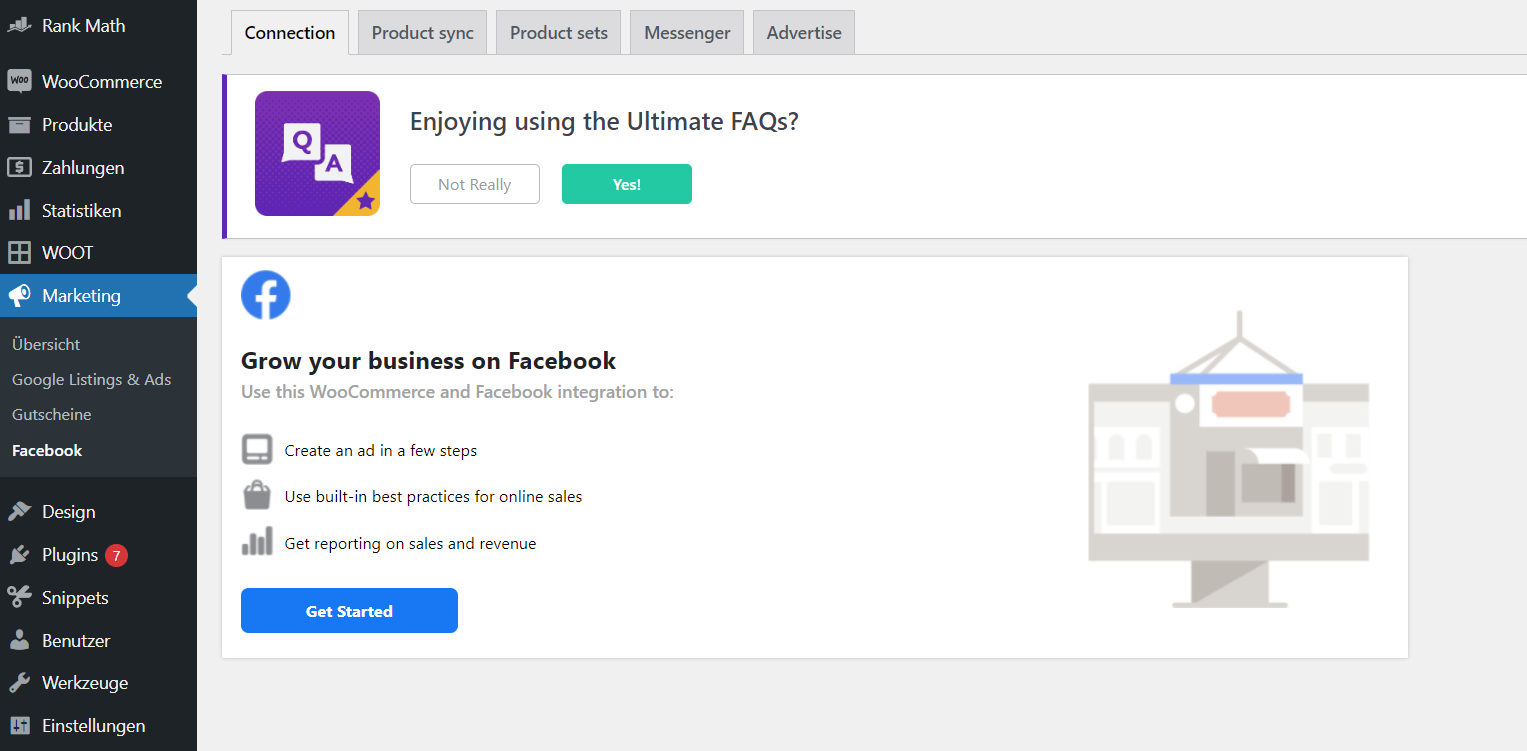
Call up the plugin settings under Marketing > Facebook > Connection and click on „Get Started“.
Facebook will now open in the same browser window. Log in to Facebook here (if you are not already logged in to the browser) and agree to the link.

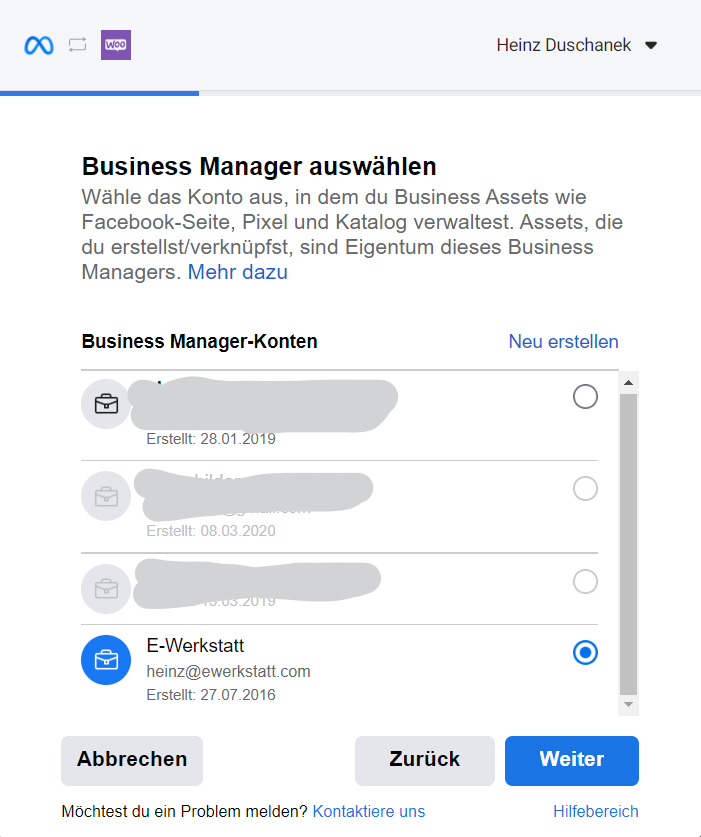
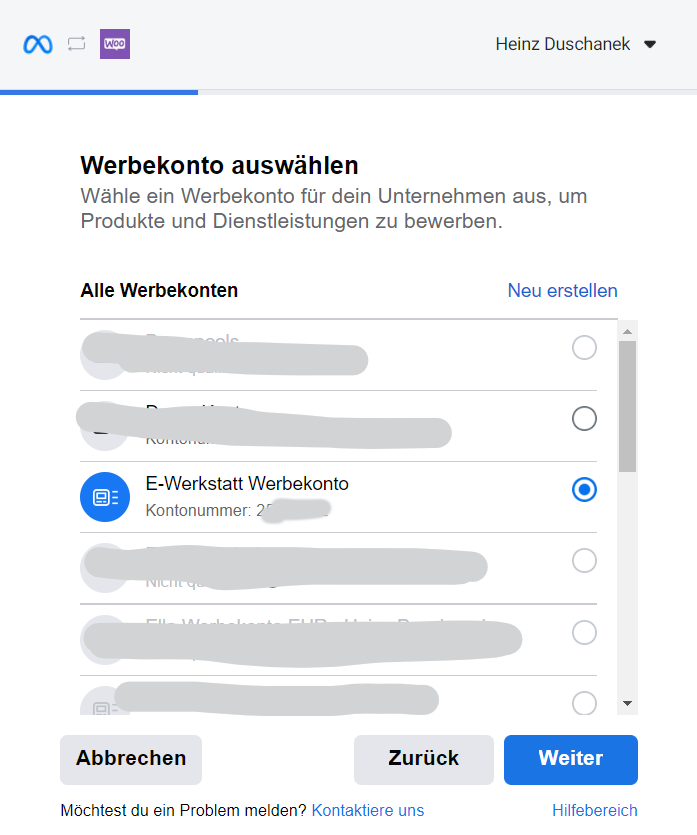
Select the appropriate Business Manager account (or create a new one).
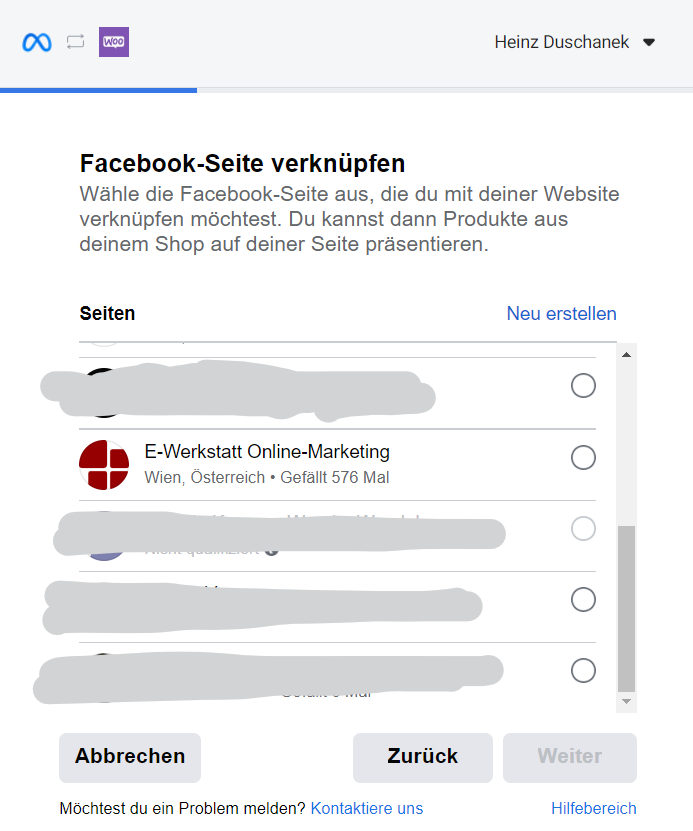
Select the corresponding Facebook page and link it by clicking on „Next“.
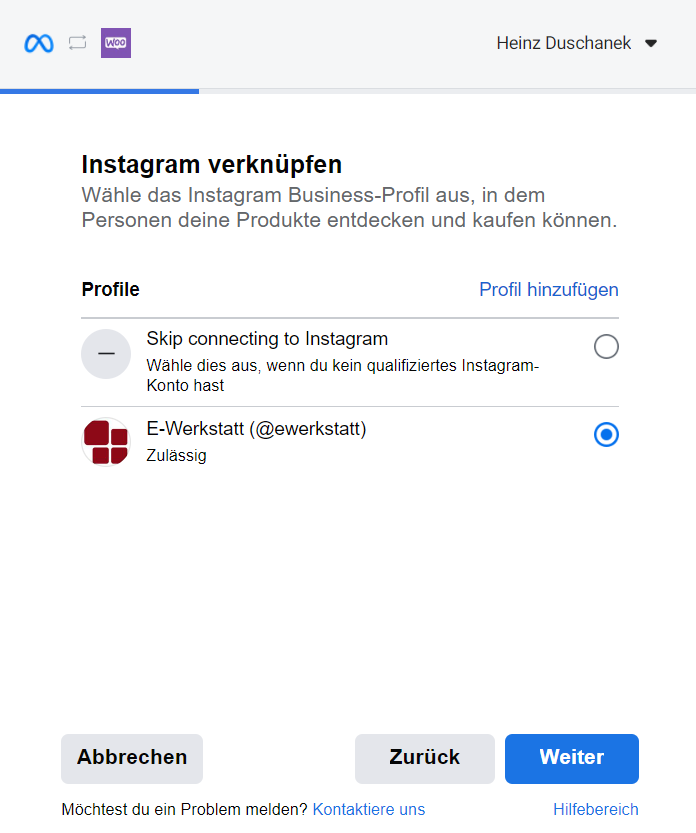
Then link your own Instagram profile (this should be a business profile!). If you do not want to show your articles on Instagram or do not have an Instagram profile at all, then select „Skip connecting to Instagram“.
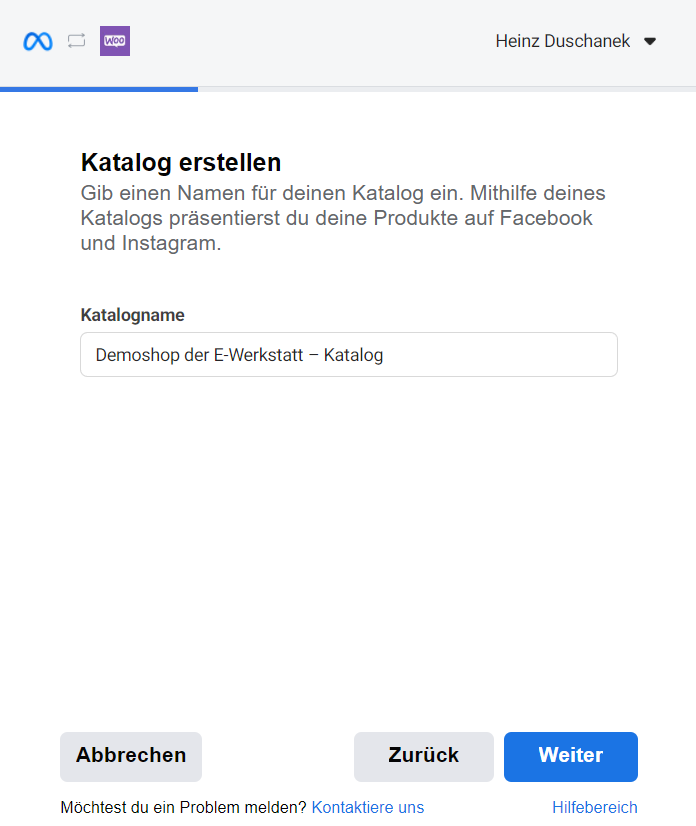
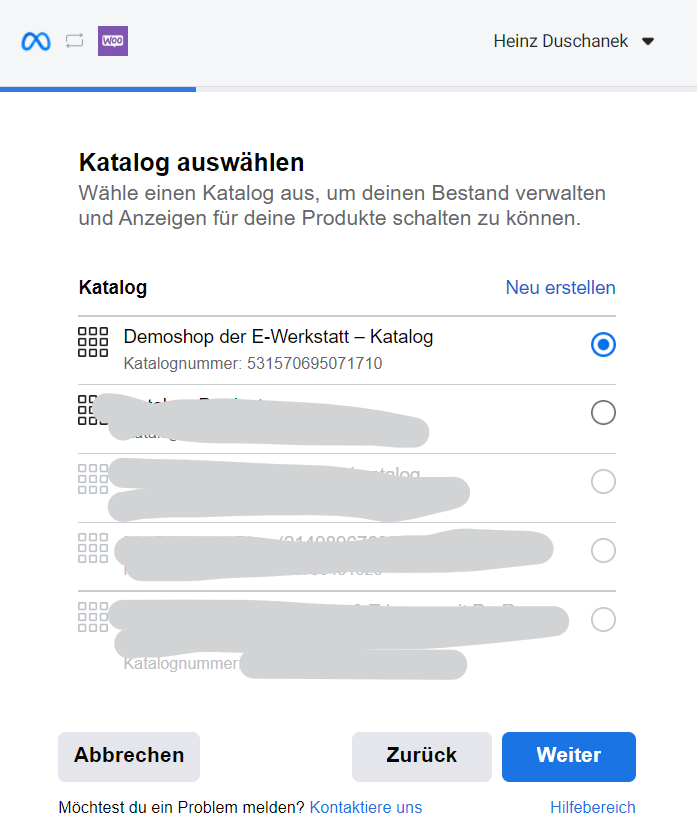
Now select the product catalog, if you have already created one, or create a new one.
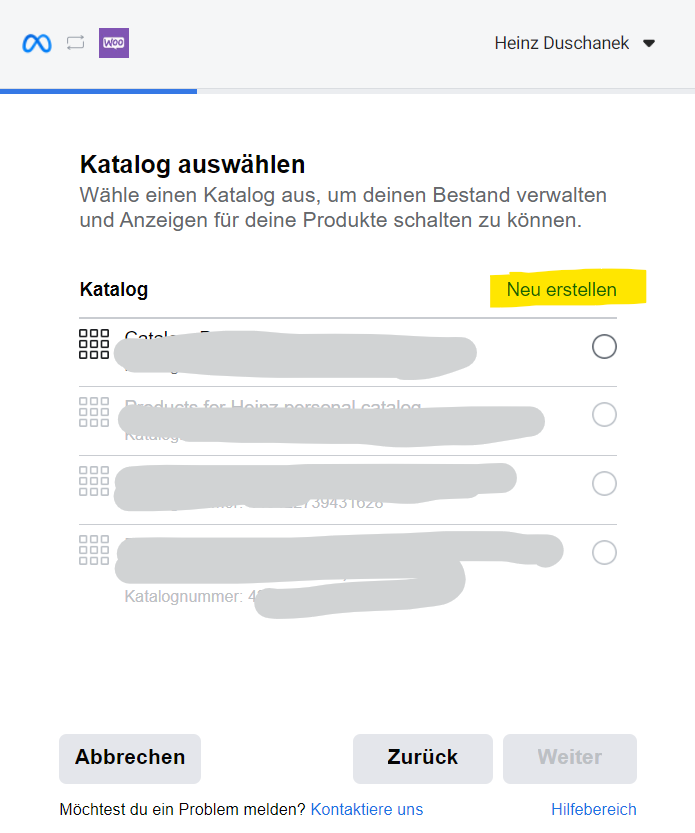
We are creating a new catalog.
Now select this catalog.
Select the advertising account now or create a new one. We already have an advertising account.
You now need to select the meta pixel (formerly Facebook Pixel) or create a new pixel. We already have one. The pixel is a tracking code that Facebook can use to record users who visit your store. The pixel is also used to make your products appear on Facebook.
Of course, the pixel code must be executed in all store pages. The plugin already takes care of this with this step. You therefore do not need to add the pixel code separately.
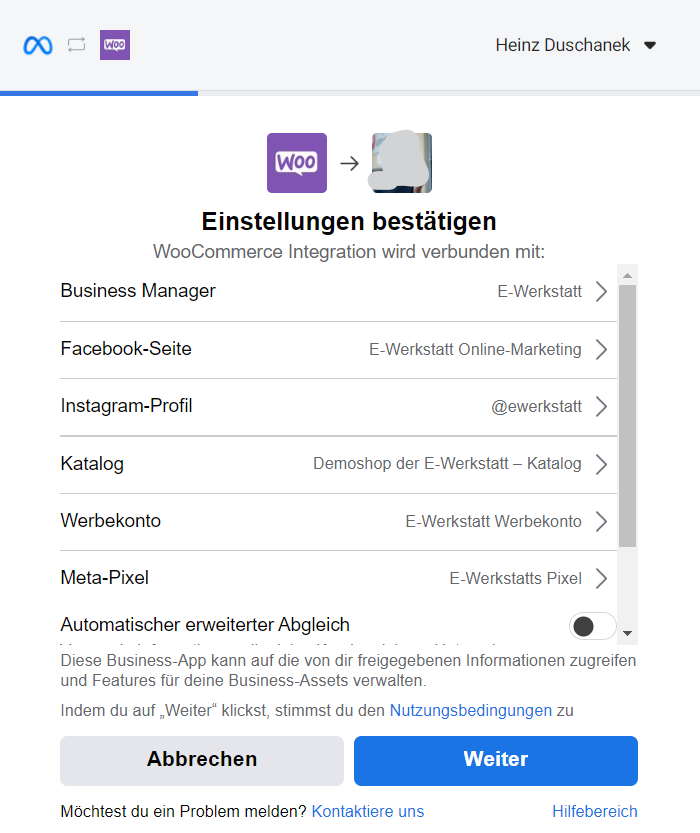
Finally, you must check and confirm the settings.
It is probably better at the moment no automatic adjustment to allow this. This is because, for example, customer data collected on the website would be sent to Facebook in the case of orders.
Facebook says:
This way you can attribute more conversions and reach more people. We hash this customer information on the website before it is sent to Facebook to protect the privacy of users.
Meta help area for companies
However, it is currently not entirely clear, at least to me, how this is to be seen in the context of the GDPR in Europe; it will probably require the individual consent of the customer. Later, customer data can also be matched manually, always with the customer's consent.
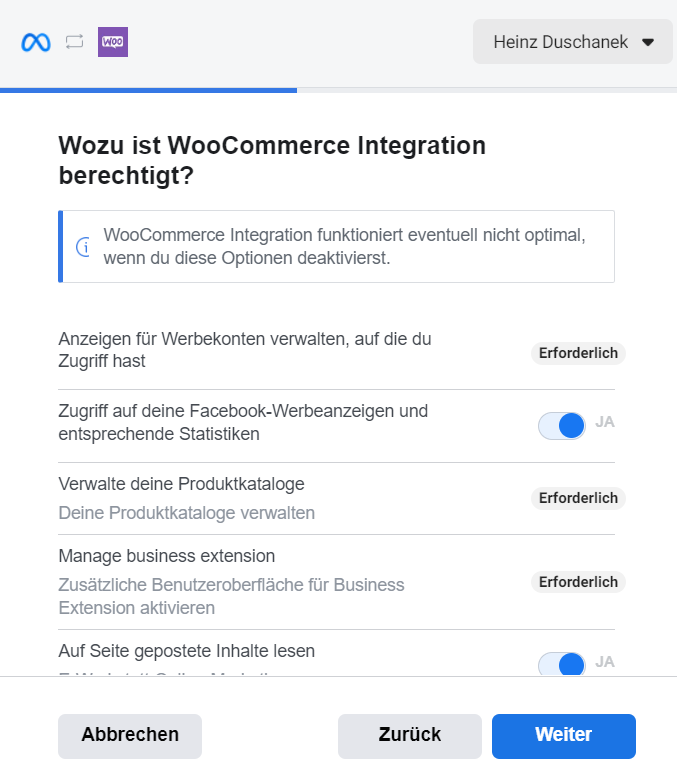
The last „Next“ button must be clicked. Check the authorizations and confirm them.
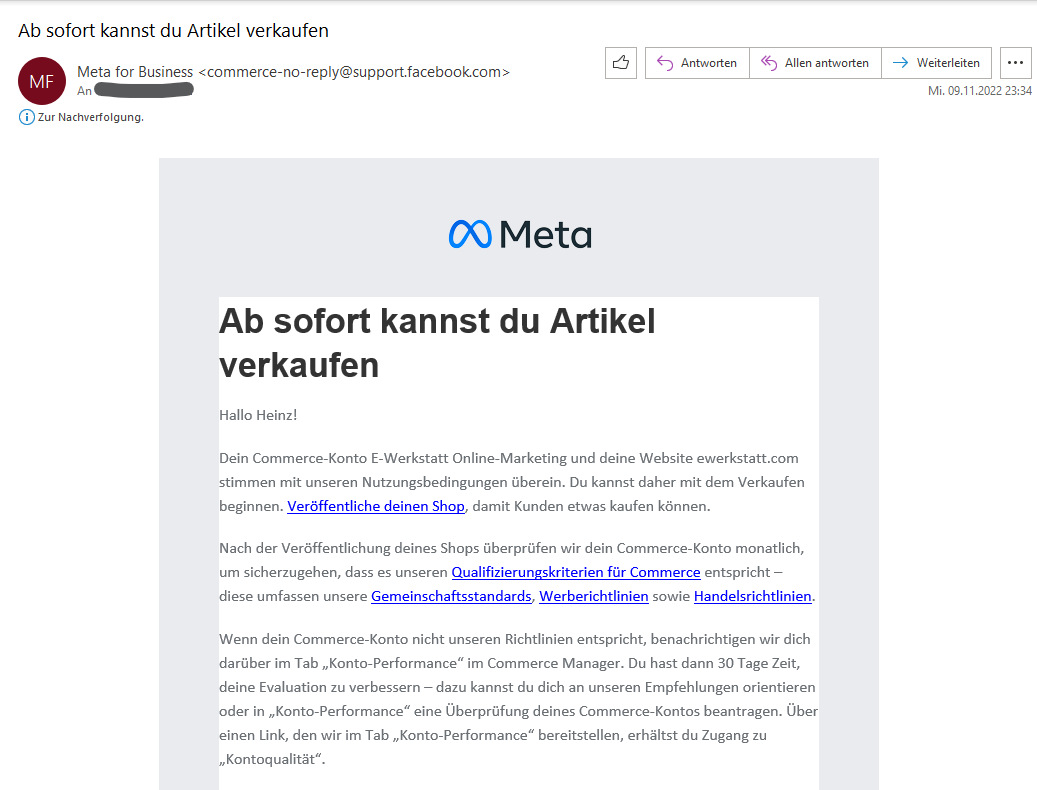
If everything works so far, woocommerce connects to Facebook.
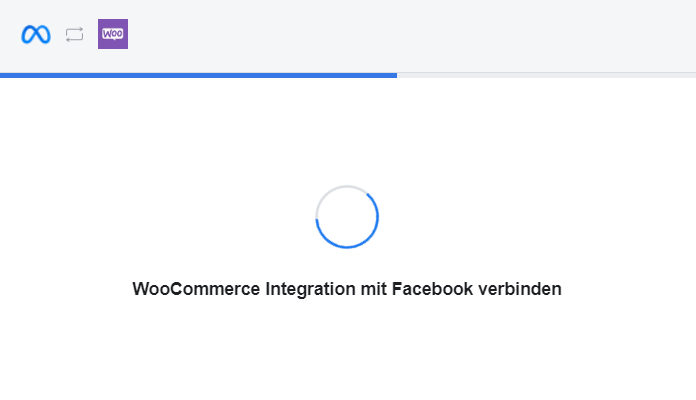
You will receive a success message after a few seconds (don't lose patience, it may take a while).
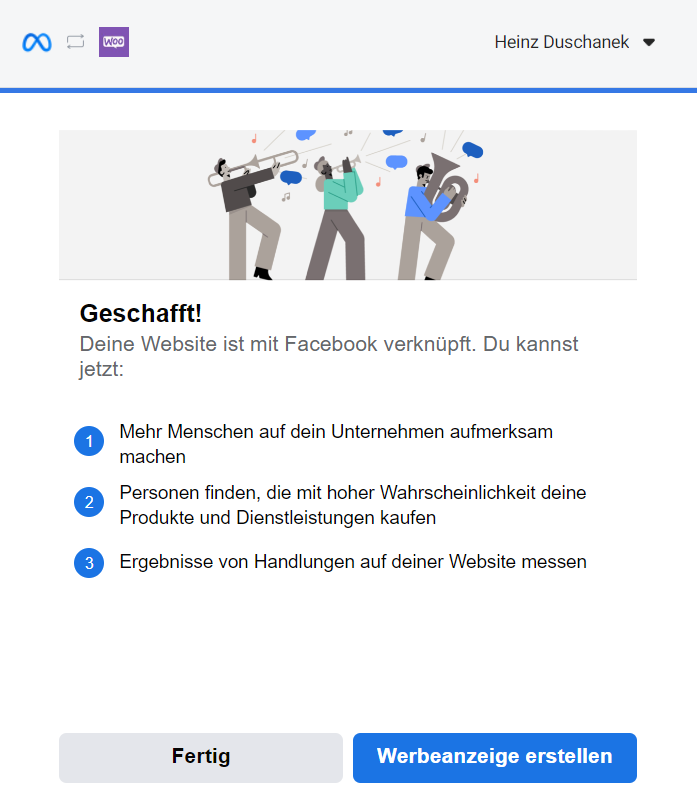
You can create an ad immediately, but first we want to see the catalog and possibly set up a Facebook store. So click on „Done“ and woocommerce will - hopefully - get back to you with a success message.
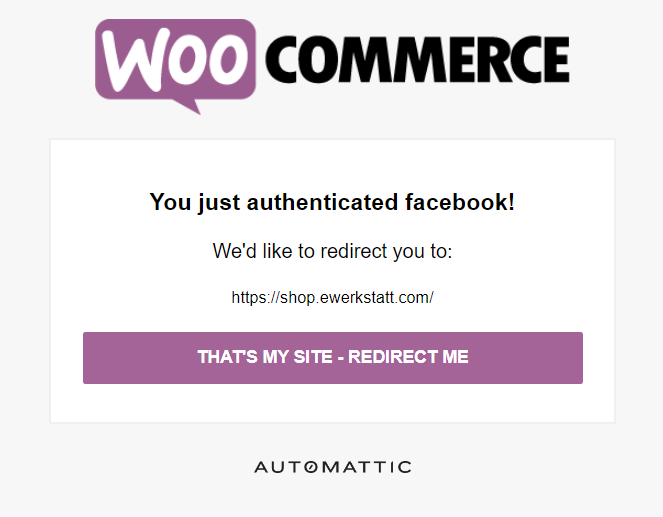
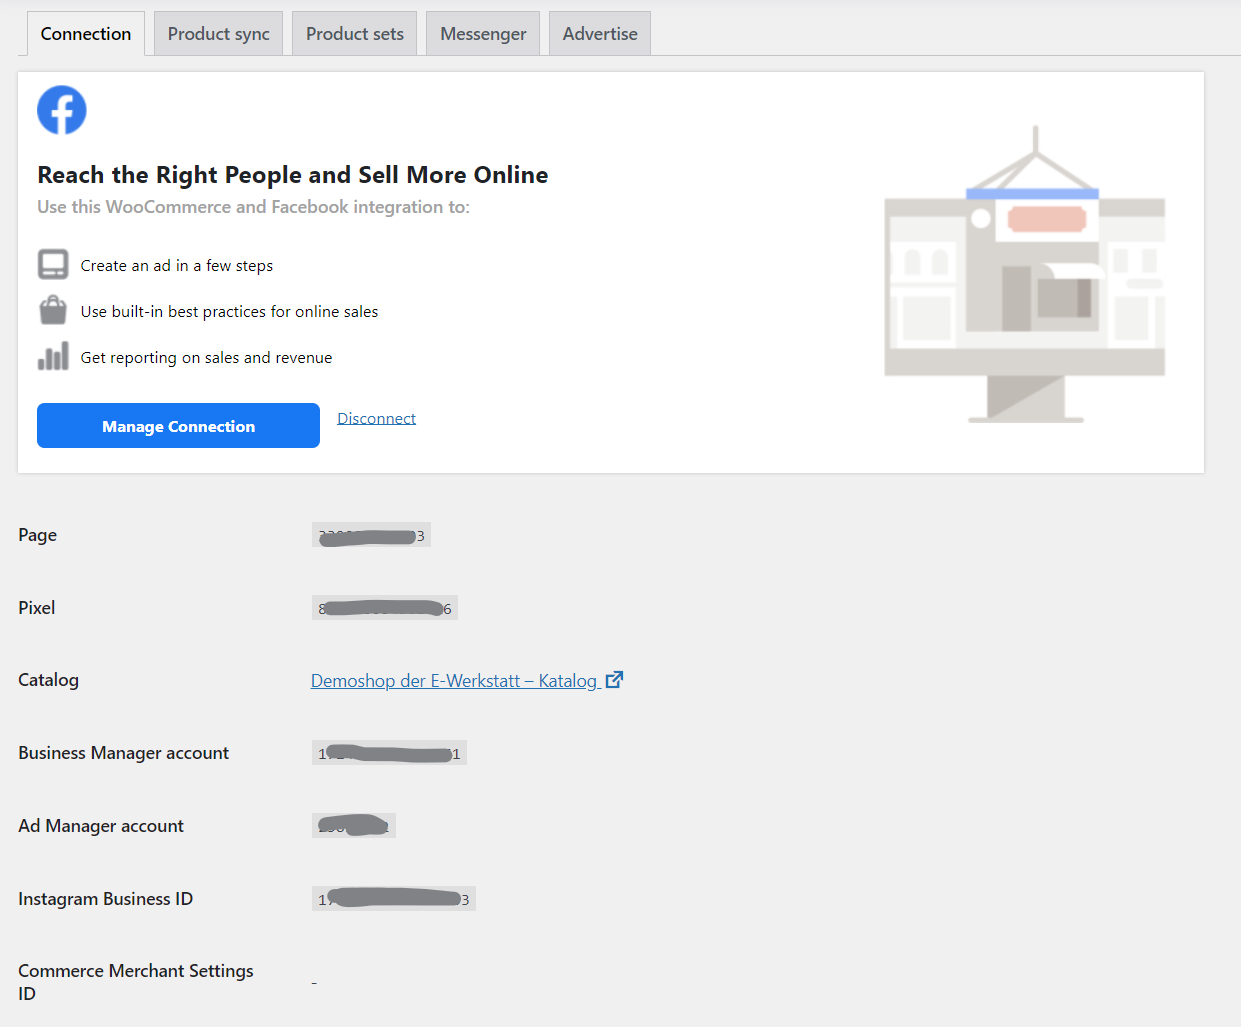
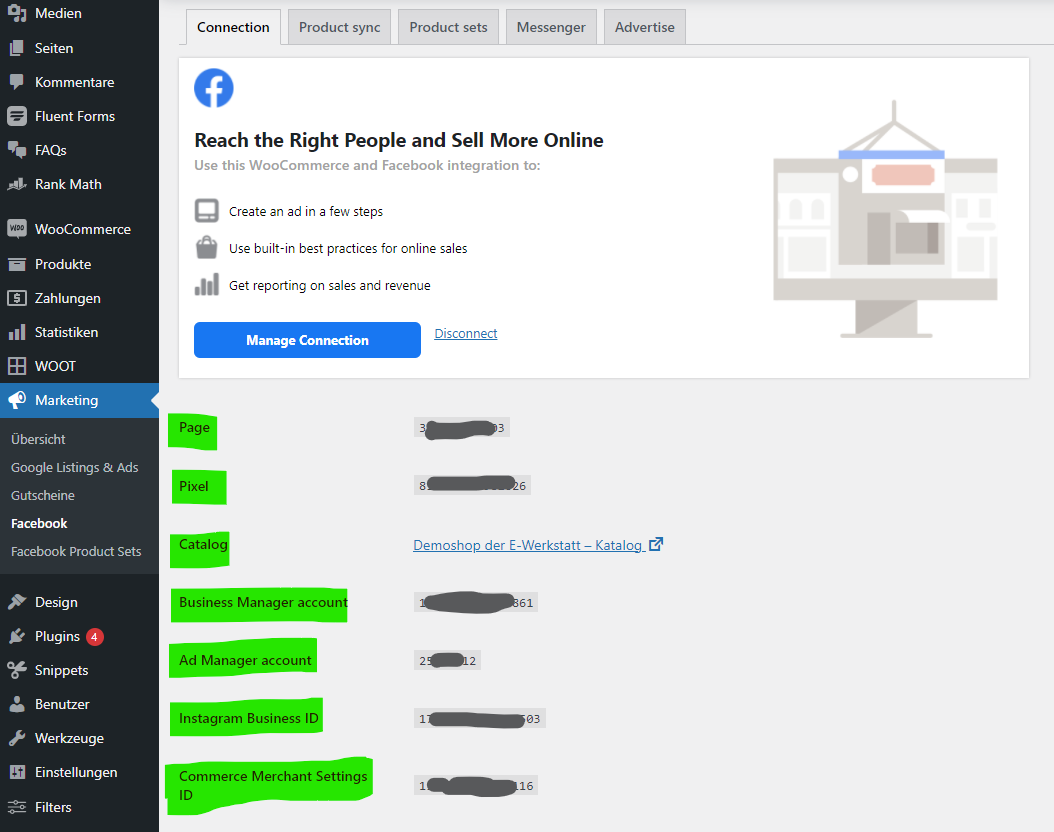
Clicking on „THAT'S MY SITE - REDIRECT ME“ will take you back to your online store. The information on the „Connection“ tab could now look like this.
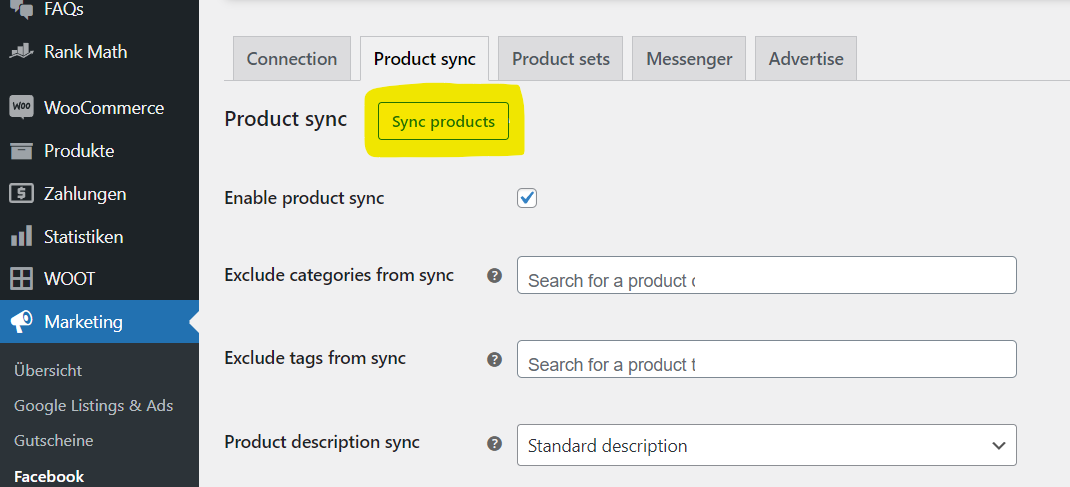
Synchronize products with Facebook
You can see the product categories that you use in your store in Woocommerce under Products > Categories. You should now „map“ these categories with Facebook categories. This is done using the Google Product Categories (Google Product Categories - GPC), because Facebook also uses the product categories created by Google.
The appropriate GPC information is generally set globally for all products (to do this, select the category that will apply to the majority of your products), but this can also be set for individual products. You may have already done this for your product data feed for the Google Merchant Center if you want to place Google Shopping Ads.
To make the assignment globally, i.e. you first make an entry for the GPC for all products in your store, call up the Marketing > Facebook > Product Sync tab and select under Default Google Product Category a suitable primary Google product category and a secondary Google product category below it. In any case, you need at least two category levels.
Our Demo store carries (not orderable) backpacks, therefore I use as main category Apparel & Accessoriesand as a subcategory Handbags, Wallets & Cases (which, strictly speaking, is not entirely appropriate, I know, but it's just an example).

The assignment of the categories enables:
- use any category-specific fields such as size, material, style or color in Facebook as well,
- and Facebook the correct tax information.
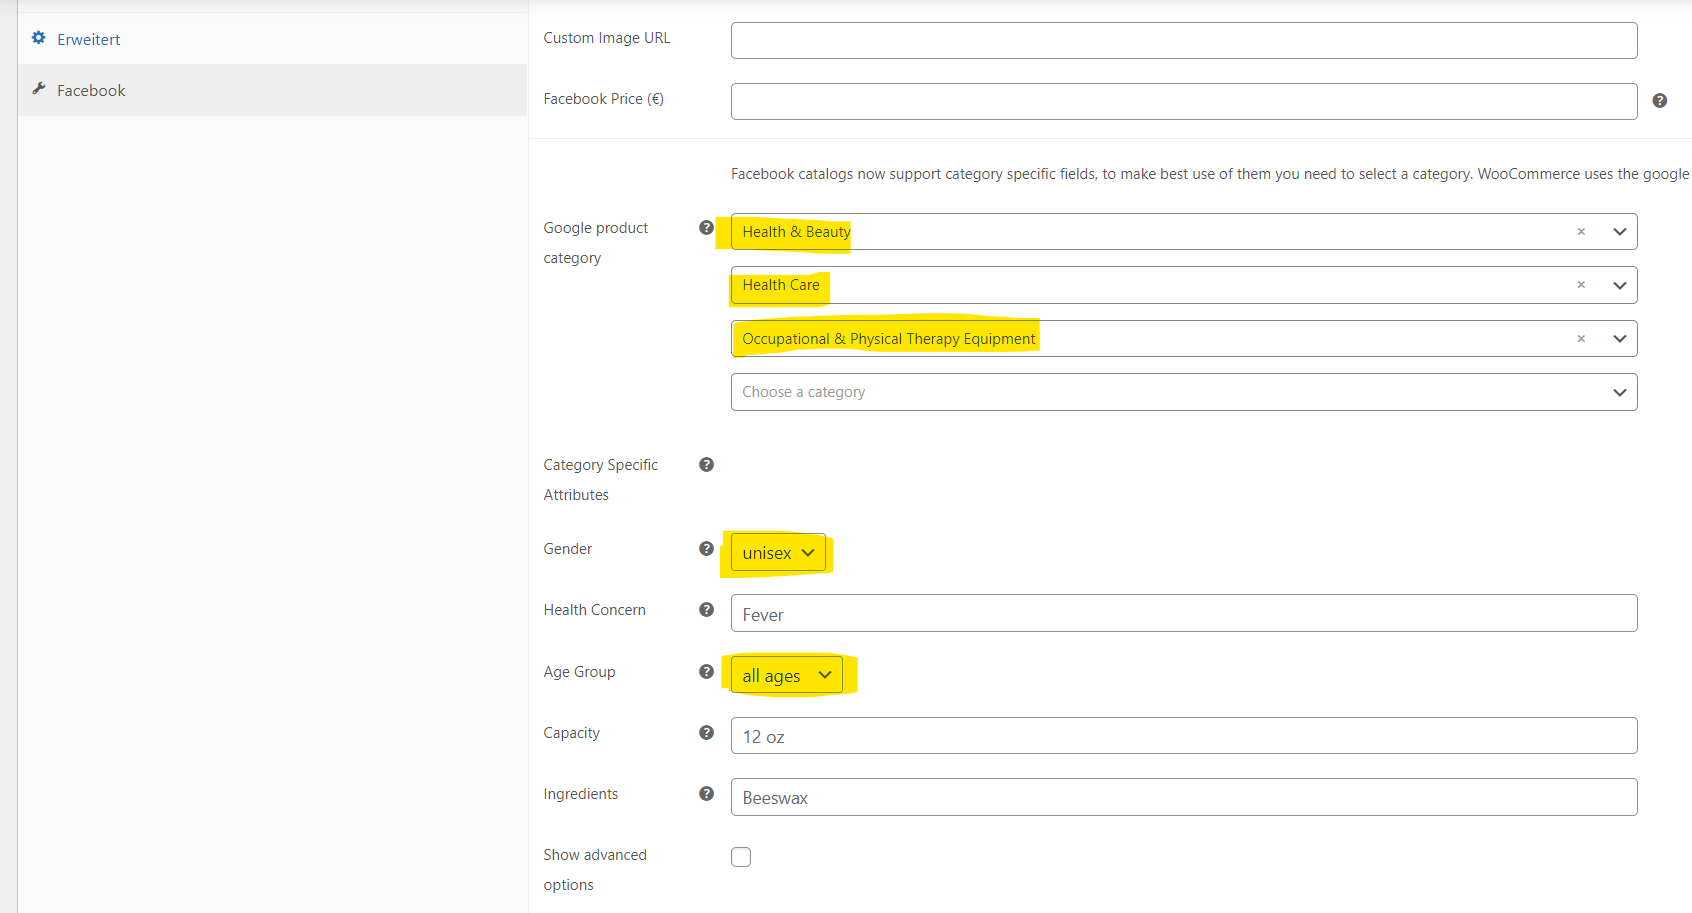
The default assignment of the Google product category can (and should) of course also be overwritten for individual products. You can also set the category-specific information (in the example below I have set unisex and all ages is set for the specific product). This is particularly important in the case of product variants, if you need to differentiate between properties. Then you could even make use of the „Advanced options“.
Your product catalog is now ready for Facebook. Synchronization with Facebook takes place automatically when products are created and changed.
If, in your opinion, synchronization is not taking place correctly (see the synchronized articles in the Facebook Commerce Manager, see below) then you can also initiate this manually:
In the Marketing > Facebook > Product Sync tab, click on the Sync products button.
On Facebook Commerce Manager you should use Catalog > Articles See your products. This makes it possible to use them in your Facebook Ads or in your Facebook or Instagram store.
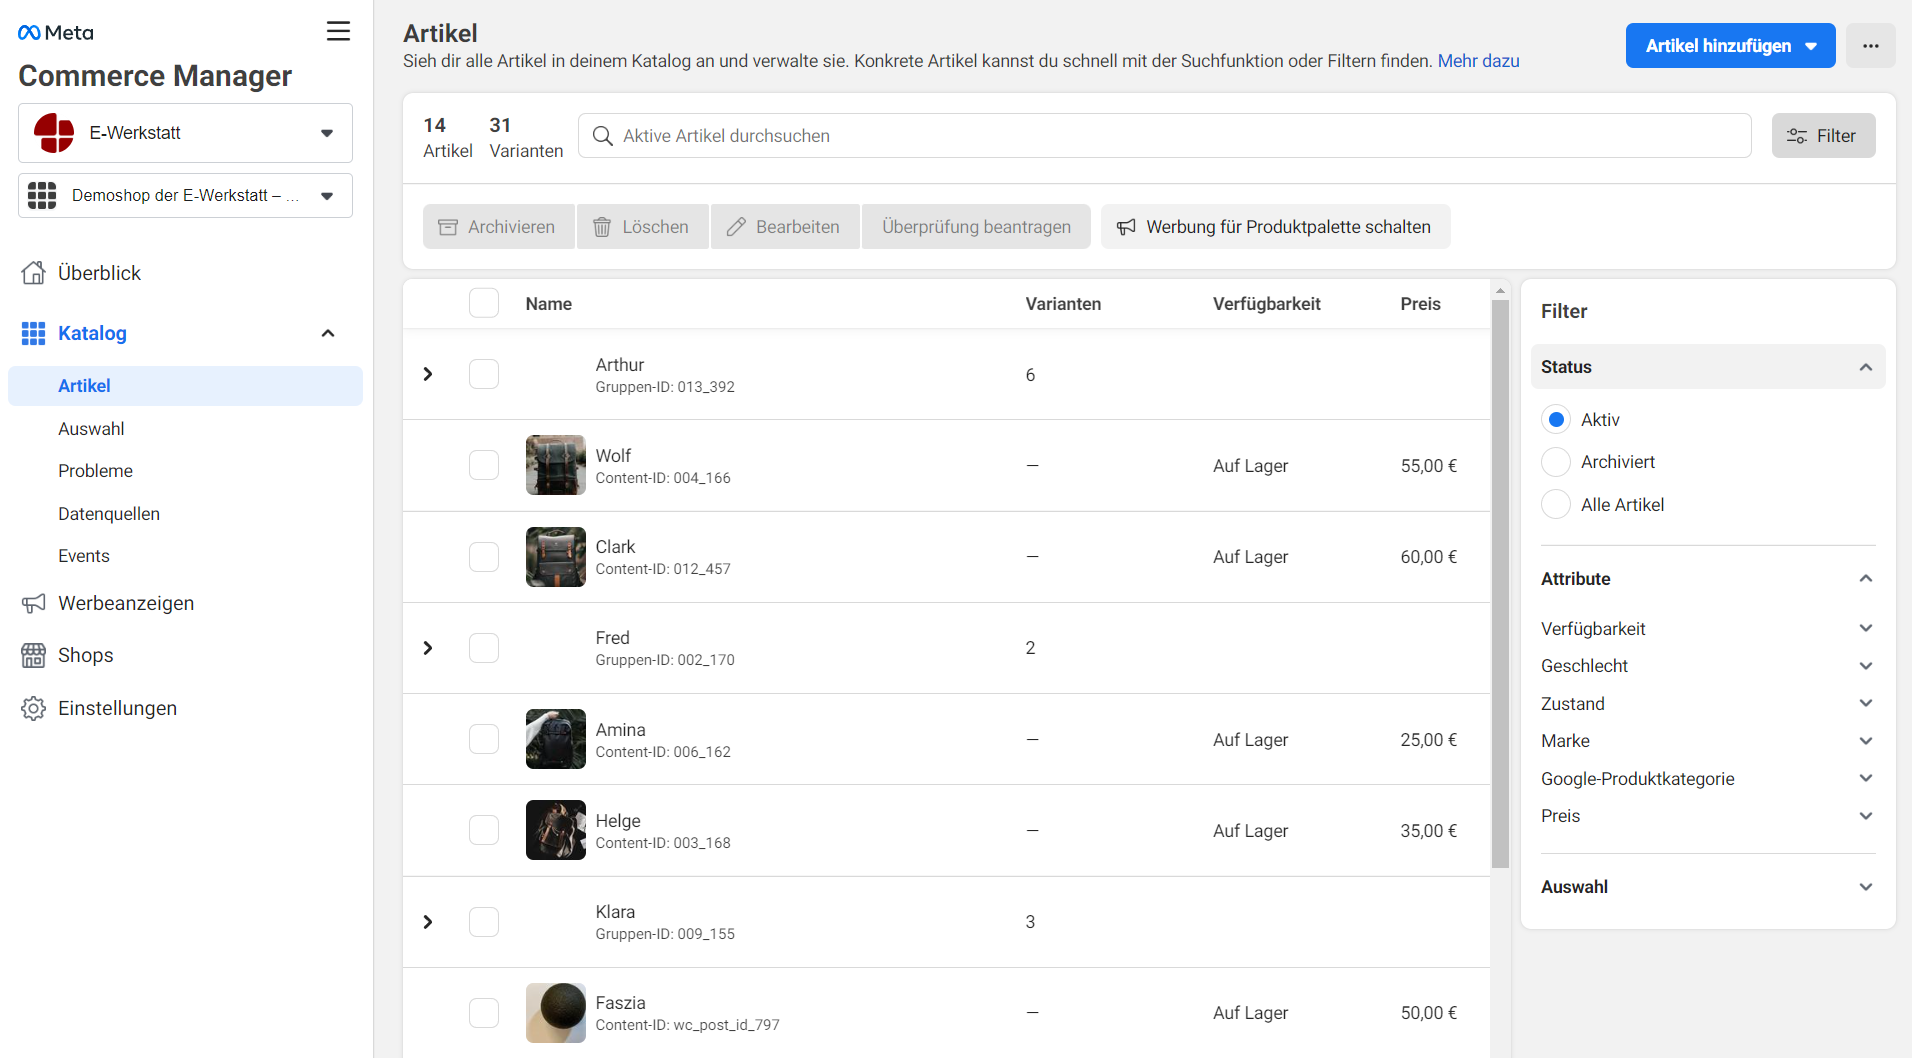
Tip: you can see what happened to your products during the most recent synchronizations in the Facebook Commerce Manager under Catalog > Data sources > Overview.

You can find a little more detail at Catalog > Data sources > Handles.

When you return to the plugin settings, you should see IDs in all rows of Facebook assets if you have set up the corresponding link. If you have not made a link, you would see a - instead of the ID.
Facebook Shop
You have created the prerequisite for selling your products via a Facebook Shop. In principle, a product catalog in Facebook can receive the articles in these ways:
- Manual entry
- Facebook Pixel for Dynamic Ads (requires the standard event ViewContent on each product page)
- Data feed via table (CSV)
- Data feed via Woocommerce integration
The store itself is always run by Facebook, the products displayed in the Facebook store are taken from the product catalog. When using a Woocommerce store, Facebook receives the product data from the connection to the Woocommerce store. The necessary synchronization of the products happens automatically, but can also be triggered manually (see above).
Note: In addition to the Woocommerce integration, you can also add products to your Facebook and Instagram store manually or using an additional data feed.
With Stores In the Facebook Commerce Manager, you can access the Shop Builder. There you can adjust colors and buttons, change the font size, create categories or Add grids, featured collections and products via drag & drop, remove or sort.
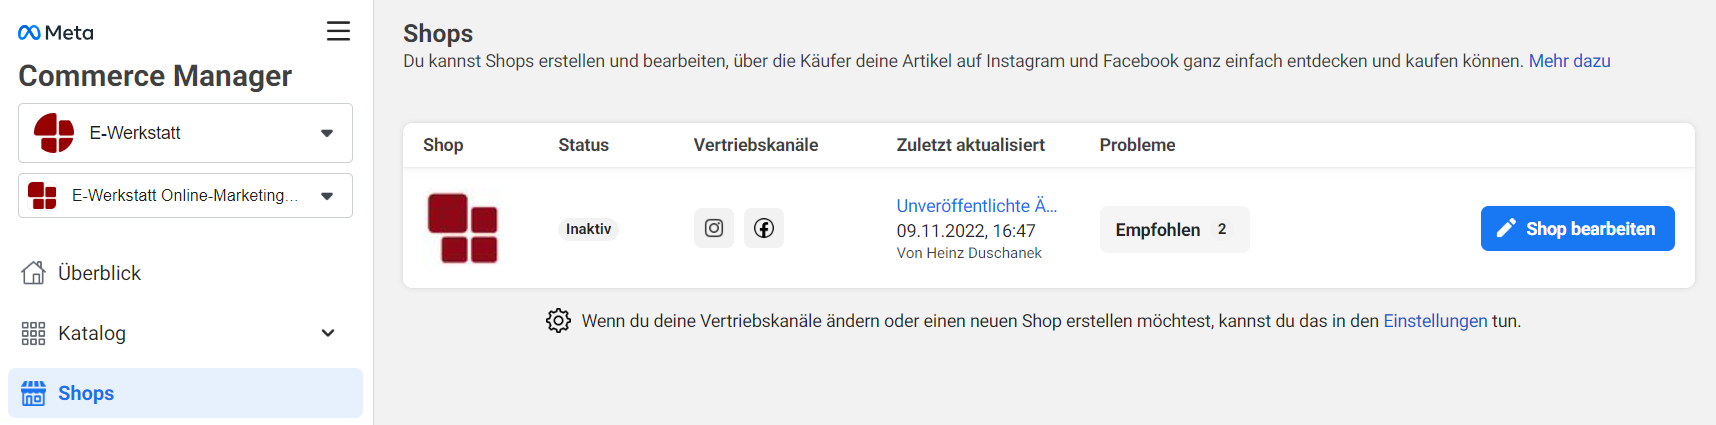
Please note that you can only link one catalog to your store at a time and continue to edit it. It is not possible to change the catalog at a later date.
After the initial setup, the store is checked by Facebook and can only be published after approval.
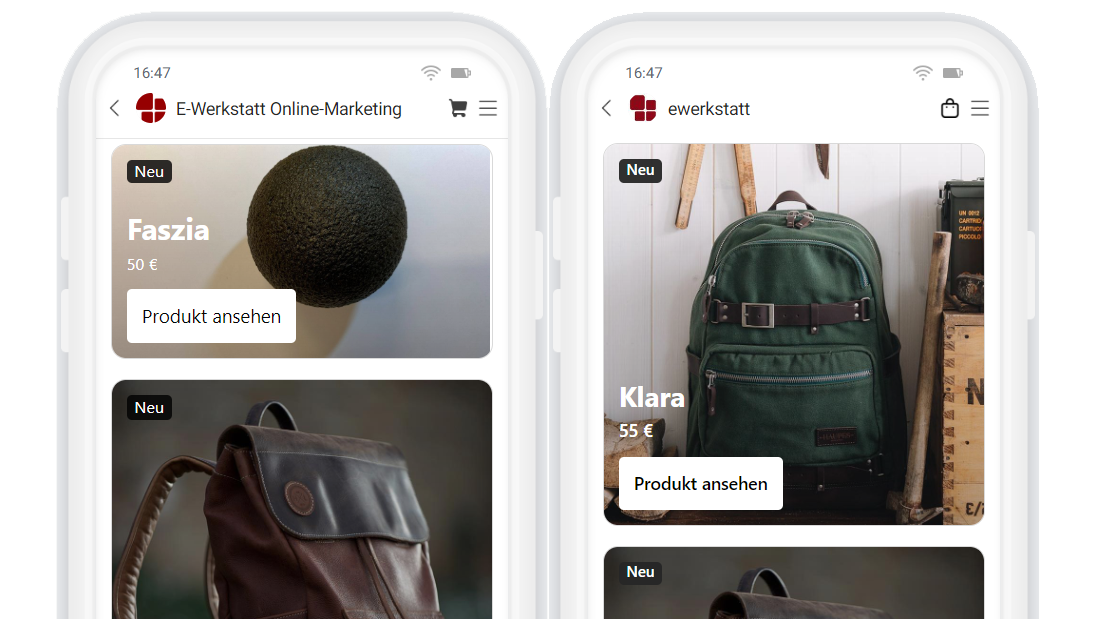
Here is the preview of the Facebook Shop (left) and the Instagram Shop (right) for our demo store.
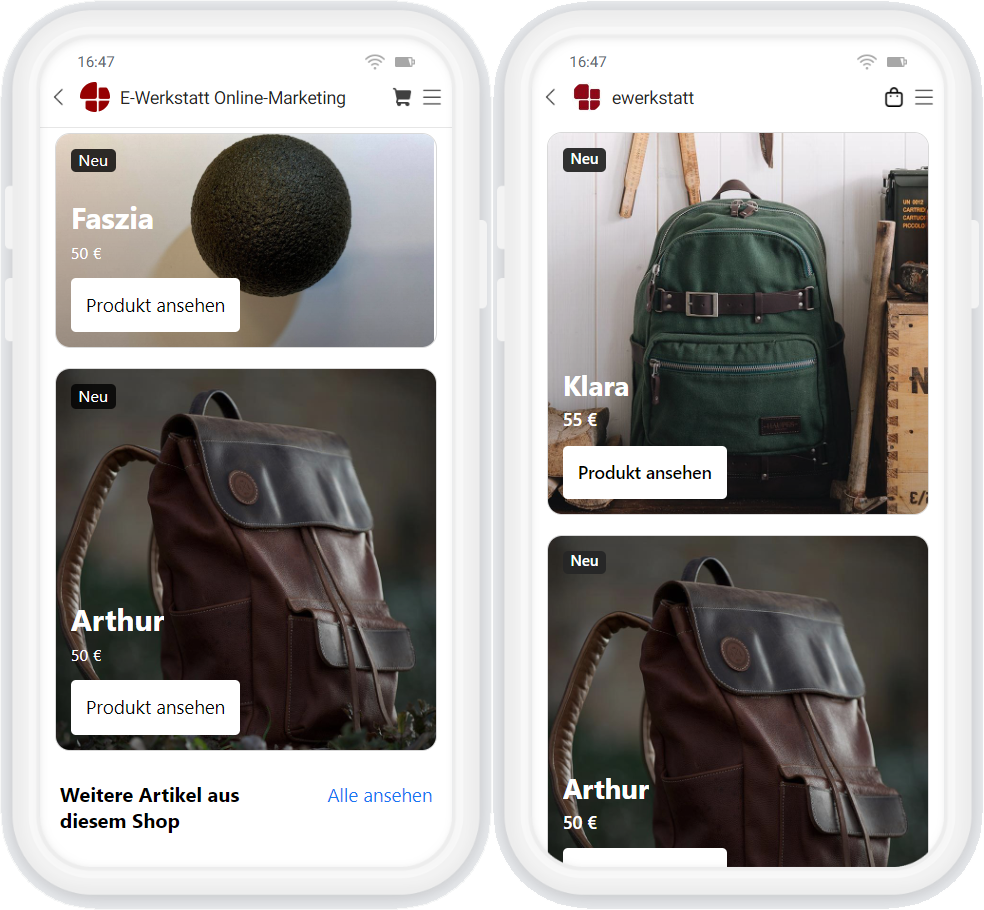
After successful verification, the Facebook Shop is live at facebook.com/Your page name/shop. Our demo store is available at https://www.facebook.com/ewerkstatt/shop/. At least as long as Facebook has nothing against a demo store. The articles are synchronized with https://shop.ewerkstatt.com.
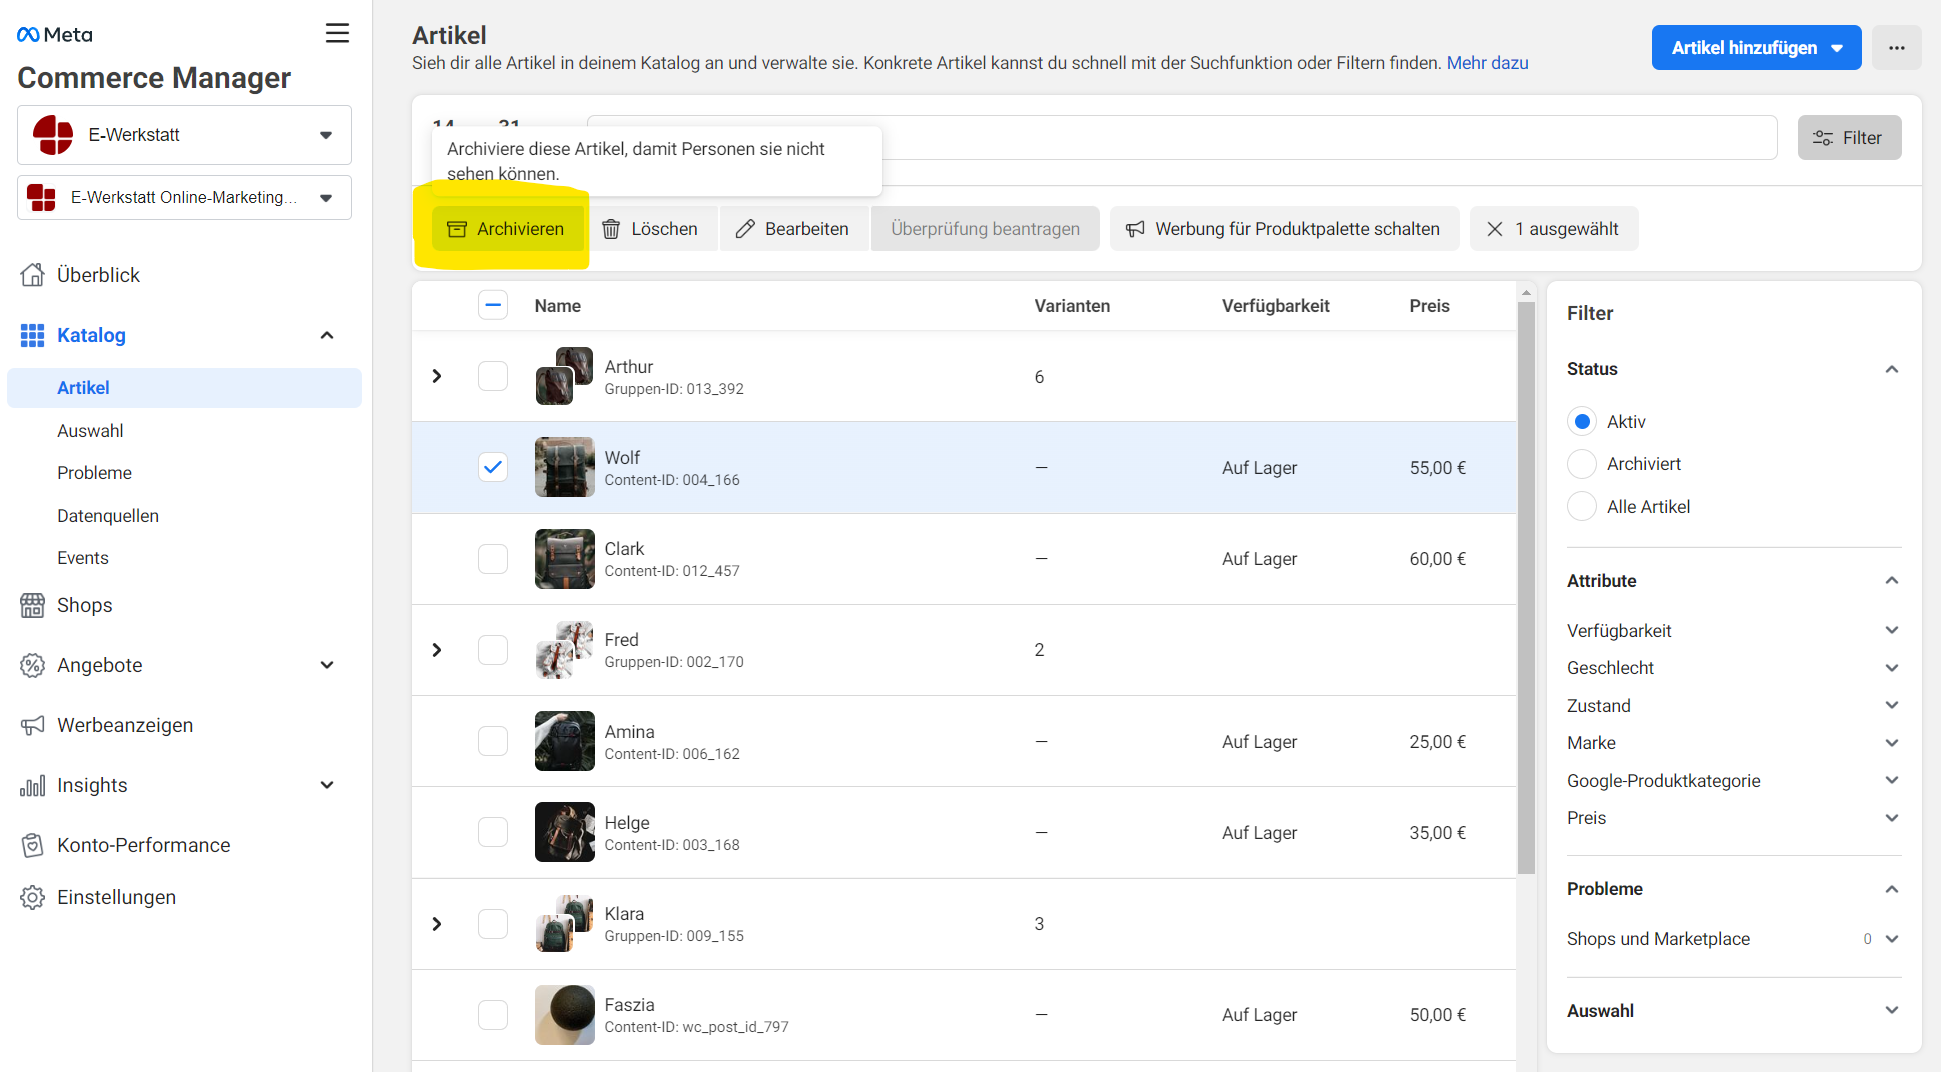
Removing products from the Facebook Shop
In principle, you can remove any product directly in the Facebook Commerce Manager under Catalog > Articles manually by archiving it. If you delete it, it can be added to the product catalog again during the next synchronization.
Would you like to exclude a Woocommerce product from the product catalog on Facebook using synchronization?
If the product not yet is in your Facebook catalog, then set the setting in Woocommerce for the product or its variants for Facebook sync to „Do not sync“. The product is not synchronized with the Facebook product catalog.
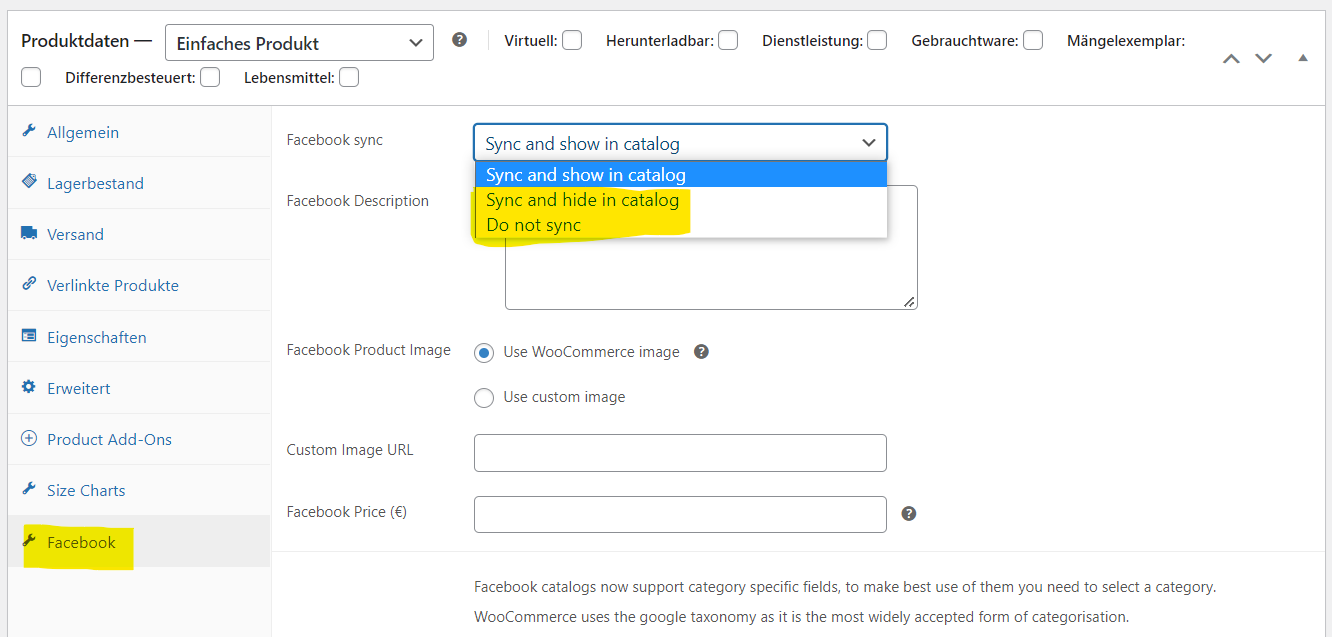
If the product already is in your Facebook catalog, then set the product or its variants to Facebook sync first of all to „Sync and hide“. This gives Facebook the information about what to do with the product, but this would not happen with „Do not sync“. „Do not sync“ does not mean to remove the product from the catalog, but only to no longer synchronize it with Woocommerce. Only when the product no longer exists in the product catalog can you switch to „Do not sync“ to preserve this status.
Would you like to be informed quickly about new articles and more?
Then we recommend that you subscribe to our newsletter "Online Marketing News from E-Werkstatt".