Tips and tools for WordPress, Google and more
Create WordPress Posts with Claude Desktop – A Beginner's Guide
This guide will first explain the key terms and then walk you through the setup step by step.
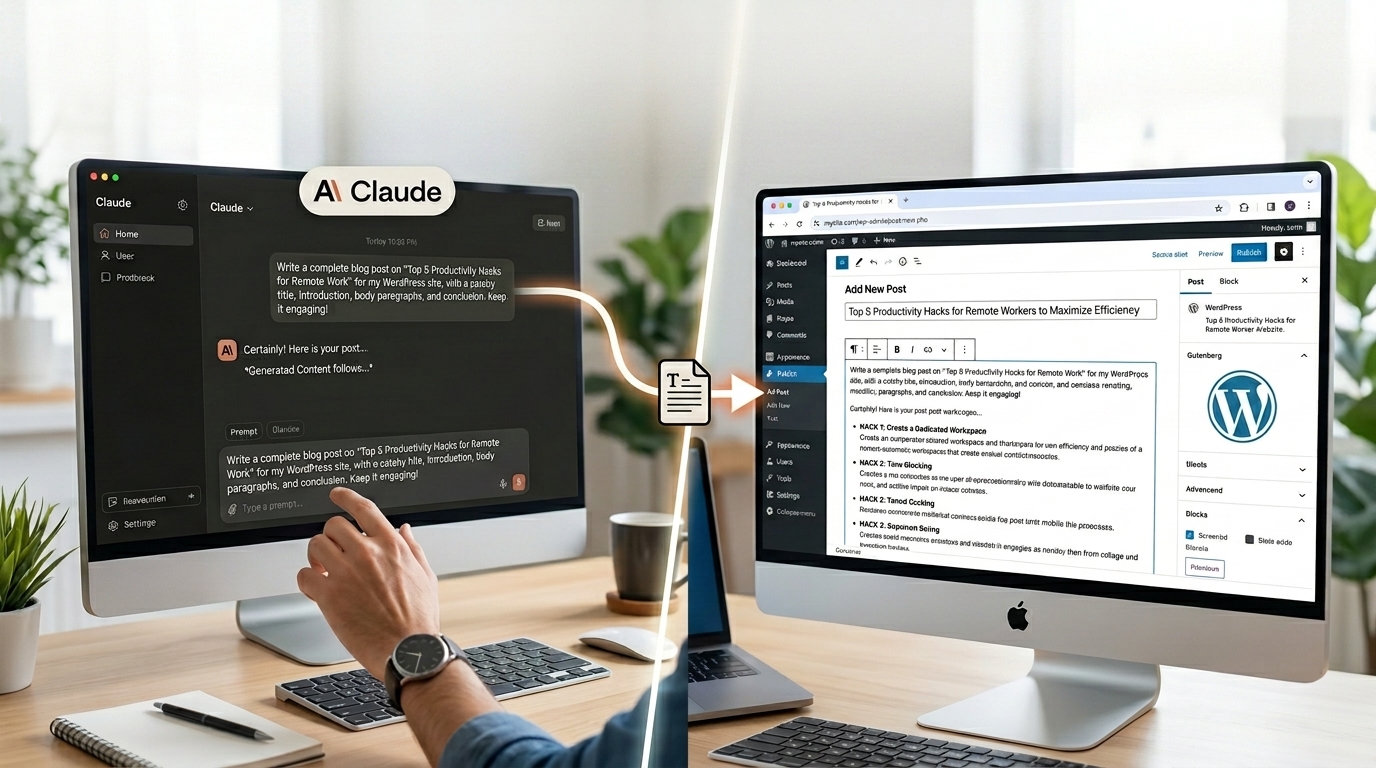
You regularly write posts in WordPress and wonder if an AI assistant can take over this work – without unchecked texts going live? That's exactly what's possible. With Claude Desktop and an interface called MCP Claude can create drafts directly on your WordPress website. Nothing is published automatically: each post lands as a draft in your backend first, which you can review at your leisure and only then approve.
This guide will first explain the most important terms and then walk you through the setup step by step. You don't need any prior programming knowledge.
Table of Contents
- The terms briefly explained
- What you need for setup
- Step 1: Install the MCP adapter plugin
- Step 2: Provide the Abilities
- Step 3: Create an Application Password
- Step 4: Connect Claude Desktop to your website
- Step 5: Test the connection
- Step 6: Generate a draft post
- Step 7: Review and then publish
- Safety and good practice
- The most important points in brief
The terms briefly explained
What is MCP?
MCP stands for „Model Context Protocol.“ It is an open standard that Anthropic (the company behind Claude) introduced at the end of 2024. The idea behind it is simple: an AI like Claude can only generate text on its own. It knows nothing about your website and cannot do anything there. MCP is the common „language“ through which Claude is allowed to speak with other programs – for example, with your WordPress installation.
You can imagine MCP as a standardized plug type: as long as both sides adhere to the standard, they connect. Previously, a custom special solution had to be built for each connection.
What is an MCP server?
The MCP server is the side that offers something. In our case, it runs on your WordPress website and provides what Claude is allowed to do there – for example, „create a post“ or „list posts.“ Claude Desktop is the counterpart, the so-called MCP client. The client asks the server what functions are available and calls them when needed.
To make your WordPress site your MCP server, you’ll install a plugin. More on that in a moment.
What are abilities?
An „ability“ (German: Fähigkeit) is a single, clearly defined action that the server, in our case WordPress, offers. „Create Post“ is one Ability, „List Posts“ is another. Each Ability has precisely defined inputs—for a post, for example, title, content, and status (draft or published).
Important for safety: Claude can only see and use abilities that are explicitly released. The plugin provides a manageable, safe basic set. Everything else remains invisible until you consciously enable it.
By the way: The abilities do not come from the MCP adapter itself. It's just the bridge. The actual functions come from WordPress, from additional plugins, or from a small piece of custom code – more on that in step 2.
What you need for setup
- Claude Desktop – Anthropic's free app for Windows or Mac.
- A self-hosted WordPress website (Version 6.9 or newer) with administrator access. The site must be reachable via HTTPS and the WordPress-native REST API – both are standard today.
- The official MCP adapter plugin for WordPress. It is the recognized standard tool for this purpose.
- A plugin that provides content abilities. The MCP adapter alone is just the bridge – it doesn't yet provide functionality for creating posts. You'll need to provide this separately (see step 2). The easiest way is through a pre-built plugin like „Enable Abilities for MCP.“.
- Node.js (Version 18 or newer) – only for the configuration file path. Node.js runs on your own computer (not on the WordPress server) and executes the small bridge program that connects Claude Desktop to your website. You install it once via the official Node.js-Website and then you don't have to worry about it anymore. With the connector path (see Step 4, Path B), Node.js is completely eliminated.
- An „Application Password.“. This is a special access password just for this connection – separate from your normal login. This way, you can revoke access at any time without changing your own password.
Step 1: Install the MCP adapter plugin
Download the latest version of the official WordPress MCP adapter from Github at https://github.com/WordPress/mcp-adapter. Click the green „Code“ button on Github and then select „Download ZIP“. Install the plugin like any other plugin: in the WordPress backend under Plugins > Install > Upload Plugin. Then activate.
After activation, the plugin automatically deploys an MCP server at a fixed address on your website (in the format https://deine-website.de/wp-json/mcp/mcp-adapter-default-serverYou will need this address later.
Step 2: Provide the Abilities
Now comes the building block that is often overlooked. The MCP adapter enables the connection and only provides three basic functions on its own: discover existing abilities, retrieve information about an ability, and execute an ability. The WordPress-specific abilities it offers additionally are also read-only. A function for Create is not included by default – you have to add it first.
There are two ways to do this:
- No code (recommended for getting started): Install and activate a ready-made abilities plugin, for example „Enable Abilities for MCP. It comes with a whole range of functions – including creating posts – and you can switch on what Claude is allowed to use in an overview using a toggle. After activation, „Create Post“ is immediately available.
- With your own plugin (for full control): Anyone who wants to release a specific function and nothing else should write their own small plugin that exclusively registers that one ability and marks it as MCP-public. This is the clean way if you consciously want to keep the exposed function narrow.
Important regarding rights: Creating posts is a writing action. It only works if the WordPress user used for the connection has the necessary permissions (for posts, the capability „publish_posts“). If in doubt, create a separate user with only the rights you need – no more. The role Author should be enough.
Step 3: Create an Application Password
In the WordPress website, ideally place a own user (e.g., „claude“) with minimal role to (role Author or Editor suffices – no administrator). Afterward, you can under User > Profile > Application Passwords generate a new password (e.g., name „Claude MCP“). It will only be displayed once, so copy it immediately. The spaces between the groups of four are part of it, so the password looks like abcd efgh ijkl mnop). Copy it immediately and securely – after closing the page, you won't see it again. Also, note down your WordPress username (not your display name).
Step 4: Connect Claude Desktop to your website
Connection via the Claude Desktop configuration file (Path A)
Claude Desktop needs to know where your website is located and how to log in. This is done through a small Configuration file.
Just a quick heads-up, so that it's clear why here Node.js appears: Claude Desktop can only communicate with locally registered servers—i.e., those that aren’t publicly accessible—via what’s known as standard input/output (stdio). However, your WordPress site is likely accessible over the internet via HTTPS. A small bridge program running on your computer acts as an intermediary between the WordPress website and Claude Desktop (on your computer), translating between the two sides. Node.js is the environment that runs this bridge program; the entry npx in the configuration below loads and starts it automatically. So you don’t have to start anything manually.
- Open Claude Desktop and go to Settings [Image] Developer. There you will find the configuration file
claude_desktop_config.jsonand open them with a text editor. Alternatively, you can open them directly:- Windows
%APPDATA%Claudeclaude_desktop_config.json - Mac
~/Library/Application Support/Claude/claude_desktop_config.json
- Windows
- Insert the following block therein. If necessary, you must insert this block just like the existing blocks.
"mcpServers": {...}-part is therefore added).
Replace the three placeholders-values („WP_API_...“) with your real data.
{
  "mcpServers": {
    "wordpress": {
      "command": "npx",
      "args": ["-y", "@automattic/mcp-wordpress-remote@latest"],
      "env": {
        "WP_API_URL": "https://your-website.com/",
        "WP_API_USERNAME": "your-username",
        "WP_API_PASSWORD": "abcd efgh ijkl mnop"
      }
    }
  }
}
Save the file and Quit Claude Desktop completely (not just close the window, but completely close the app). The next time you start it, Claude will automatically connect to your website.
Alternative: Connection via a connector (Path B)
If your MCP server is publicly accessible from the internet and supports OAuth login, it's much easier – without Node.js and without a configuration file. You enter the server address directly in the Claude interface.
- Open Claude's settings and go to the section Connectors (depending on the version, under „Customize“ or „Settings“).
- Click below Add own connector Add custom connector.
- Enter a name (e.g., „My WordPress Site“) and enter the address of your MCP server in the format
https://deine-website.de/wp-json/mcp/mcp-adapter-default-server. - If your server requires login with its own OAuth credentials, you can store them under Advanced settings (OAuth Client ID and Secret). This is not necessary for many servers.
- Click Add and follow the login process – usually a window opens where you confirm access.
Afterwards, the released abilities are immediately available – just like when using the configuration file. Two more tips: The function is currently marked as beta, and only one custom connector is possible in the free tier. In team and enterprise accounts, an owner first sets up the connector, and then individual users connect to it.
KnowHow – Configuration file vs. Claude Connector
Two ways to connect Claude to your website
Which one is right for you depends mainly on whether your website is publicly accessible from the internet.
Path A – via a configuration file (local bridge): The connection is established from your own computer. Claude Desktop starts a small bridge program there, which calls your website. You enter the access in a text file.
- You need Node.js, to edit the configuration file, and Claude Desktop needs to be restarted.
- Works with almost any self-hosted site your computer can reach – including local or staging installations. The site doesn't need to be publicly accessible.
- Only works in the desktop app.
Path B - via a connector (in the interface): You only enter the address of your MCP server in Claude's settings. No file, no terminal, no Node.js. The connection is established from Claude's cloud to your website.
- You only need the public server address; login is usually via OAuth.
- Only works if your site is publicly accessible from the internet and supports the appropriate login (for example, WordPress.com plans or hosted providers). A purely local or staging site is excluded.
- It works across all Claude access points: browser, desktop, and mobile.
Rule of thumb Self-hosted, local, or staging, with an application password? Take Path A. Publicly accessible and as little technology as possible? Take Path B.
Step 5: Test the connection
Start a new conversation in Claude Desktop and ask, for example: „What WordPress features are available to you?“ If setup is successful, Claude lists the shared abilities, including creating posts. If it's not successful, it's usually a security plugin (like Wordfence) that's blocking access to the REST API. In this case, you'll need to change the path /wp-json/ in the security plugin's settings.
Step 6: Generate a draft post
Now comes the real benefit. Formulate your wish in plain language, for example:
„Write a post about the five most common mistakes in garden watering in the summer, approximately 600 words, with subheadings, and save it as a draft.“
Claude drafts the text and then calls the „Create Post“ ability. Before this happens, Claude Desktop asks for your permission – so you see exactly which action will be performed and actively confirm it. The post is saved with the status „Draft“. Nothing goes online without your consent.
Step 7: Review and then publish
Open your WordPress backend at Posts > Drafts. The new post is located there. Read it through thoroughly, add images, check facts and sources, adapt the wording to your tonality, and check the title and any SEO information., change the author.
Only when everything is in order do you click Publish.
This separation is at the core of the approach: The AI takes over writing and technical setup, while editorial responsibility remains with you.
Safety and good practice
- Unless otherwise specified, only drafts. Save Claude as a draft by default and publish manually. This way, no unchecked text can go live.
- Consciously confirm actions. In Claude Desktop, only confirm actions that you understand. Be especially careful with anything that modifies or deletes data.
- Only release necessary abilities. The fewer features that are exposed, the lower the risk. The included basic setup is sufficient for creating posts.
- Treat application passwords like passwords. Do not share, do not save in public files. If you no longer need access, delete the application password in WordPress – the connection will be immediately severed.
- First on a test environment. Ideally, try the setup on a staging or test page before using it on a live website.
The most important points in brief
MCP connects Claude to your WordPress website: The MCP adapter is the bridge, an additional abilities plugin (or custom code) provides the actual functions, and each individual ability determines what Claude is allowed to do. With „Draft“ status and manual approval, you retain full control: Claude provides the first draft, and you decide what gets published.
A final note: The WordPress MCP environment is currently evolving rapidly. Plugin names, versions, and connection paths may change. If in doubt, refer to the official documentation before you begin.
Would you like to be informed quickly about new articles and more?
Then we recommend that you subscribe to our newsletter "Online Marketing News from E-Werkstatt".